Pre-Procedure Steps for Successful Manual Instrument Ear Wax Removal
Ear wax, also known as cerumen, is a natural substance produced by the ears to protect and lubricate the ear canal. However, in some cases, ear wax can build up and cause discomfort, hearing loss, or even ear infections. When this happens, manual instrument ear wax removal may be necessary. In this article, we will discuss the pre-procedure steps that are essential for a successful and safe manual instrument ear wax removal.
Understanding the Importance of Pre-Procedure Steps
Before attempting any manual instrument ear wax removal, it is crucial to understand the significance of following specific pre-procedure steps. These steps ensure the safety and effectiveness of the procedure while minimising the risk of injury or complications. By properly preparing the ear and the necessary tools, you can increase the chances of a successful ear wax removal and prevent any potential damage to the ear canal or eardrum.
Importance of Pre-Procedure Steps
Following the pre-procedure steps is vital for several reasons:
- Safety: Preparing the ear and gathering the necessary tools helps ensure the safety of both the patient and the person performing the procedure. It reduces the risk of injury, infection, or complications during the ear wax removal process.
- Effectiveness: Proper preparation increases the likelihood of a successful ear wax removal. By following the pre-procedure steps, you can optimise visibility, access, and control during the procedure, resulting in a more effective removal of the ear wax.
- Minimising Risk: By taking the necessary precautions before starting the procedure, you can minimise the risk of damage to the ear canal or eardrum. This is especially important since the ear canal and eardrum are sensitive and delicate structures that require careful handling.
Step 1: Gather the Necessary Tools
To perform a manual instrument ear wax removal, you will need a few essential tools:
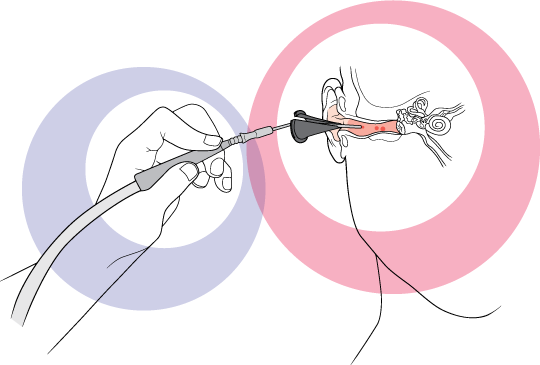
- Otoscope: An otoscope is a specialised instrument used to examine the ear canal and eardrum. It provides a magnified view of the ear, allowing you to assess the presence and location of the ear wax buildup accurately.
- Microsuction Kit: A microsuction kit consists of a specially designed vacuum and zoellner suction tube attachment. This tool helps to gently extract the wax, giving patients instant relief.
- Curette or Loop: These instruments are used to manually remove the ear wax from the ear canal. They come in various sizes and shapes, allowing for precise and safe removal of the ear wax.
Importance of Gathering the Necessary Tools
Having the right tools is essential for a successful manual instrument ear wax removal:
- Accurate Assessment: The otoscope allows for a detailed examination of the ear canal and eardrum, enabling you to identify the location and extent of the ear wax buildup accurately. This information is crucial for planning the removal process.
- Effective Removal: The microsuction kit and the curette or loop are designed specifically for ear wax removal. These tools provide the necessary means to soften, flush, and manually remove the ear wax safely and effectively.
- Minimising Risk: Using the appropriate tools reduces the risk of complications or injury during the procedure. Each tool serves a specific purpose and ensures precise and controlled movements, minimising the risk of damage to the ear canal or eardrum.
Ensure that all the tools are clean and sterilised before use to minimise the risk of infection.
Step 2: Prepare the Environment
Creating a safe and comfortable environment is essential for a successful manual instrument ear wax removal. Follow these steps to prepare the environment:
- Choose a Well-Lit Area: Performing the procedure in a well-lit room or using a portable light source ensures proper visibility. Adequate lighting is crucial for accurate examination and removal of the ear wax.
- Sit in a Comfortable Position: It is important to ensure that the patient is comfortable during the procedure. Use a chair or an examination table where they can lean back comfortably with their head tilted to the side. This position allows for better access to the ear canal and ease of instrument manipulation.
- Use a Towel or Drape: Placing a towel or drape around the patient’s shoulder and neck helps catch any debris or excess ear wax that may come out during the procedure. It keeps the patient clean and prevents any mess or discomfort.
Importance of Preparing the Environment
Creating the right environment contributes to the success and comfort of the manual instrument ear wax removal:
- Visibility: Adequate lighting ensures that you can see the ear canal clearly, enabling accurate assessment and removal of the ear wax. It reduces the chances of missing any ear wax buildup or causing unnecessary injury.
- Patient Comfort: A comfortable position helps the patient relax and remain still during the procedure. It is essential to minimise any discomfort or potential movement that may interfere with the removal process.
- Hygiene and Cleanliness: Using a towel or drape helps maintain cleanliness during the procedure. It prevents the spread of debris or excess ear wax and ensures a hygienic environment for both the patient and the person performing the removal.
By following these steps, you can create an environment that promotes safety, efficiency, and patient comfort during the manual instrument ear wax removal process.
Step 3: Explain the Procedure to the Patient
It is crucial to explain the procedure to the patient beforehand, addressing any concerns or questions they may have. This helps to alleviate anxiety and create a cooperative environment. Be sure to cover the following points:
- Description of the Procedure: Explain the steps involved in the manual instrument ear wax removal, from the examination to the actual removal process. Provide a clear and concise overview of what the patient can expect during the procedure.
- Possible Sensations: Inform the patient about the sensations they may experience during the procedure, such as pressure or mild discomfort. It is important to reassure them that these sensations are normal and temporary.
- Expected Results: Discuss the expected outcome of the procedure, including improved hearing and relief from any symptoms caused by the ear wax buildup. Highlight the benefits of ear wax removal and how it can enhance their overall ear health and well-being.
Importance of Explaining the Procedure to the Patient
Explaining the procedure to the patient helps establish trust and cooperation:
- Patient Comfort: By explaining the steps involved, you can alleviate any anxiety or fear the patient may have. They will have a better understanding of what to expect and be more likely to cooperate during the procedure.
- Informed Consent: Providing a clear explanation of the procedure ensures that the patient gives informed consent. They can make an informed decision about whether to proceed with the ear wax removal and have realistic expectations about the outcome.
- Cooperative Environment: By addressing concerns or questions, you can create a cooperative environment where the patient feels comfortable and actively participates in their own care. This contributes to a smoother and more successful ear wax removal process.
Taking the time to explain the procedure to the patient is an important step in ensuring their understanding, comfort, and cooperation throughout the manual instrument ear wax removal process.
Step 4: Prepare the Ear
Before starting the manual instrument ear wax removal, it is essential to prepare the ear properly:
- Inspect the Ear: Use the otoscope to examine the ear canal and eardrum. Look for any signs of infection, injury, or abnormality that may affect the procedure. If any issues are detected, consult an Audiologist before proceeding.
- Clean the Outer Ear: Gently clean the outer part of the ear with a soft, damp cloth to remove any dirt or debris. Avoid inserting anything into the ear canal.
- Softening the Ear Wax: If the ear wax is hardened or impacted, it may be necessary to soften it before removal. Over-the-counter ear drops or olive oil can be used to soften the wax. Follow the manufacturer’s instructions or consult an Audiologist for guidance.
Importance of Preparing the Ear
Properly preparing the ear is crucial for a successful and safe manual instrument ear wax removal:
- Assessment: Inspecting the ear using an otoscope allows you to identify any issues that may affect the procedure, such as infection or injury. It is essential to address these issues before proceeding to avoid complications.
- Cleanliness: Cleaning the outer ear removes any dirt or debris that may interfere with the ear wax removal process. It ensures a clean environment and reduces the risk of contamination.
- Softening the Wax: Softening the ear wax makes it easier to remove. Hardened or impacted wax can be challenging to extract, and attempting removal without softening may cause pain, discomfort, or damage. Softening the wax allows for a smoother and more successful removal process.
Properly preparing the ear sets the stage for a safe and effective manual instrument ear wax removal. It ensures that the ear is in the best condition for successful removal and minimises the risk of complications.
Step 5: Begin the Procedure
Once the ear is prepared, you can begin the manual instrument ear wax removal:
- Use the Otoscope: Re-examine the ear canal using the otoscope to ensure proper visibility and locate the ear wax buildup. This step is crucial to accurately guide the removal process and avoid any damage to the ear canal or eardrum.
- Start with Gentle Movements: Use the chosen instrument (curette or loop) to gently remove the ear wax. Begin with slow and controlled movements to prevent any injury or discomfort. Avoid pushing the instrument too far into the ear canal, as this can cause trauma and complications.
- Be Patient: Manual instrument ear wax removal may require multiple attempts and passes to completely remove the ear wax. Take your time and be patient throughout the process. Rushing or applying excessive force can lead to unintended consequences or injury.
Importance of the Procedure Steps
Each step of the procedure is important for a successful manual instrument ear wax removal:
- Accurate Assessment: Re-examining the ear canal with the otoscope ensures that the ear wax is located and can be effectively targeted for removal. This step helps guide the subsequent removal process.
- Gentle Movements: Using gentle and controlled movements with the chosen instrument helps prevent injury or discomfort. It allows for precise removal of the ear wax without causing trauma to the ear canal or eardrum.
- Patience: Being patient throughout the procedure is crucial. Ear wax removal can be a gradual process, and rushing or applying excessive force can lead to complications or injury. Patience ensures a safe and successful removal.
By following these steps, you can perform a manual instrument ear wax removal that is safe, effective, and minimises the risk of complications.
Conclusion
Successful manual instrument ear wax removal requires proper preparation and adherence to pre-procedure steps. By following these guidelines, you can ensure a safe and effective procedure while minimising the risk of complications. Remember to always exercise caution and consult an Audiologist if you have any doubts or concerns. Proper ear wax removal can lead to improved hearing and relief from associated symptoms, enhancing overall ear health and well-being.


